Looking for a creative way to bring nature indoors? DIY moss wall art is a stunning and simple project that adds natural texture and greenery to any room—no green thumb needed! Whether you’re into eco-friendly decor or want to try something new, moss wall art makes a great weekend craft.
Using preserved moss, this project is low-maintenance, budget-friendly, and surprisingly relaxing. In this guide, we’ll walk you through how to create your own moss wall decor from start to finish—even if you’re a beginner. Ready to bring some lush, green vibes into your space? Let’s dive in!
What You’ll Need
Before you get started on your DIY moss wall art, gather your materials so everything’s ready to go. The best part? You don’t need anything fancy—just a few supplies you can find online, at your local craft store, or even from nature.
Basic Supplies:
- Preserved moss (reindeer moss, sheet moss, or a mix for texture)
- Picture frame, wood board, or canvas (any size you like)
- Hot glue gun + glue sticks
- Scissors
- Protective gloves (optional, but helpful)
Optional Extras for a Stylish Touch:
- Driftwood, twigs, or bark for natural accents
- Small stones or crystals
- Mini faux succulents
- Acrylic paint (for painting your base or frame)
- LED fairy lights (for added ambiance)
Tip: If you’re short on time, consider using a DIY moss wall art kit, which comes with pre-cut materials and instructions.
How to Make Moss Wall Art: Step-by-Step Instructions
Creating your own DIY moss wall art is easier than you think—and super satisfying! Follow these steps to bring your green masterpiece to life.
Step 1: Prep Your Base
Choose your base—a wood board, framed canvas, or shadow box. If you’re using a picture frame, remove the glass and backing so you’re left with the outer frame and a flat surface to glue on.
Optional: Paint your base a neutral or dark color to make the moss pop.
Step 2: Plan Your Design
Lay out your moss and decorative pieces to see how you want your wall art to look. Play with texture and shape—layer reindeer moss for a bubbly effect or mix in sheet moss for smoothness.
Step 3: Start Gluing
Use your glue gun to attach moss to the base. Work in small sections so the glue doesn’t dry too fast. Press firmly.
- Start with large moss pieces
- Fill gaps with smaller bits
- Add accents last
Step 4: Add Finishing Touches
Step back, check your design, and add any final details like stones or faux plants. Let it dry completely.
Step 5: Hang It Up
Use hanging hardware or Command strips. Moss art is usually lightweight, so no need for heavy-duty mounts.
Pro Tip: Keep it away from direct sunlight and humidity to preserve its color and texture.
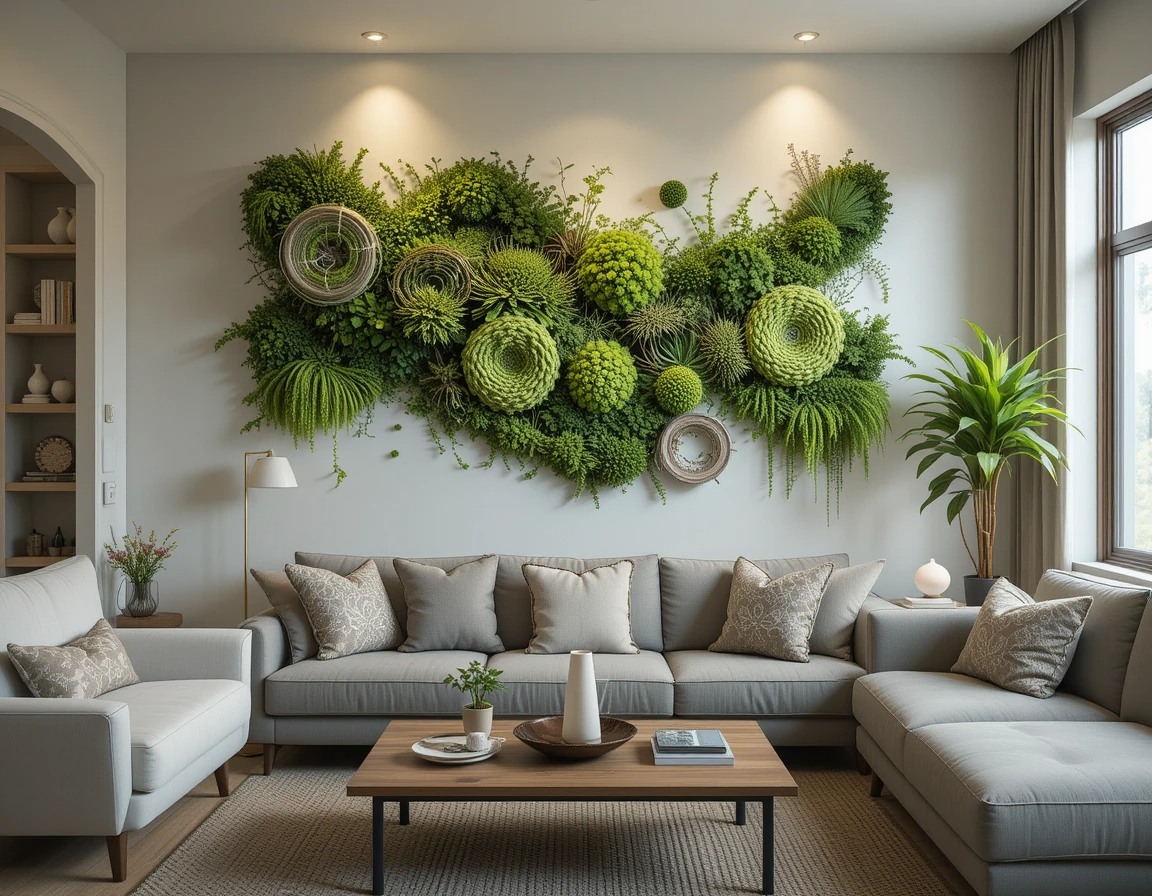
Creative Moss Wall Ideas & Styles
Want to go beyond the basics? Here are some fresh ideas to customize your moss wall decor:
Minimalist Moss Panel
Single-texture design using sheet moss on a painted base for modern, spa-like vibes.
Boho Vibe
Layer in driftwood, stones, and dried flowers for a warm, nature-inspired look.
Framed Moss Art
Use a vintage or decorative frame for contrast and elegance.
Abstract Moss Canvas
Blend moss types to create movement and patterns—think swirls, waves, or stripes.
Moss Wall Letters
Glue moss onto large wood letters or shapes—perfect for initials or words like “ZEN” or “HOME.”
Light-Up Moss Art
Wrap LED fairy lights around your piece for a magical, glowing effect.
Maintenance Tips for Moss Wall Art
The best part? Preserved moss needs little to no care. But to keep your wall art looking fresh:
Dust Lightly
Every few weeks, dust using a soft brush or gently blow air with a cool hairdryer.
Avoid Direct Sunlight & Humidity
These can fade the color or cause glue to loosen.
Reapply If Needed
If moss comes loose over time, just re-glue it. You can also fluff it gently to bring back texture.
How Long Does It Last?
With basic care, your moss wall art can last months to several years!
Where to Buy Moss or Moss Art Kits
You can find DIY moss wall supplies and kits online or in craft stores.
Best Places to Shop:
- Amazon – Bulk moss and craft tools
- Etsy – Handmade and specialty moss supplies
- Michaels / Joann – Local availability and seasonal deals
- Tropical Glass – Known for large-scale moss wall art kits
- Kraft Stories – Offers beginner-friendly kits with wood frames, moss, and glue
Why Buy a Kit?
- Pre-cut materials
- Easy instructions
- Great for beginners or quick decor
Some even include extras like bark, fairy lights, or faux succulents!
Final Thoughts + Inspiration Recap
Making your own DIY moss wall art is fun, relaxing, and seriously rewarding. It’s a great way to personalize your space while adding natural beauty—without worrying about plant care.
Here’s what you now know:
- What materials you need
- How to build your moss wall art step-by-step
- Creative styles and designs to try
- How to keep it looking fresh
- Where to find the best moss and kits
So grab that glue gun, pick your moss, and start creating your one-of-a-kind green masterpiece.
Tried this project? Drop a comment or tag your creation on social media—we’d love to see it!